I have released v2.95 – you find it here
February 20, 2013 Updated to v2.70 with these changes:
- Fixed bug where the tab setup link is missing in initial setup.
- Added “show field description when readonly” switch under “Misc” section.
- Added support for SP 2013.
- Small change to the file default.css to remove form background color in SP 2013 (goes better with the SP 2013 look).
- Added error handling when using invalid characters in the custom css setup in the heading configuration and including.
- Added support for rules comparing date columns against other date columns in the form, or validation of empty / not empty date columns.
January 13, 2013 Updated to v2.65 with these changes:
Fixes:
- Validation text was shown multiple times if the rule was triggered repeatedly.
- When saving the GUI the input values for visible or hidden tabs / headings got the previous rule value if the fields were left blank.
- Error message in DispForm due to “customValidationMsg” being triggered.
- Update the css file (note the text “Dynamic Forms for SharePoint v2.65” in the top) to help wrap the tabs better when not using the “Break tabs at index” option.
New features
- It’s now possible to have a rule check other rules before triggering.
January 4, 2013 Updated to v2.61 BETA with these changes:
- Set field value had a bug preventing choice fields from being set correctly.
- Added MUI support for the validation message / alert.
January 1, 2013 Updated to v2.6 BETA with these new features:
- Option to bypass all rules for selected users or groups (Misc tab).
- Set date column value like [today], [today]-14 or [today]+14.
- Tabs now support MUI.
- Added support for headings (MUI).
- Changed boolean column behavior to fix issue with hiding tabs.
You must update these files: “DynamicFormsForSharePoint.js” and “default.css”.
Regarding setting a date column to [today]
Not all reginal settings are supported. You will get an alert with instructions if your LCID is not supported.
Headings
You find the headings in the tabs section, and you add them as you do with the fields. Hover over the help icon in the GUI to learn how to set up MUI
Please note that you must update spjs-utility.js to v1.13.
04.11.2012 Updated to v2.51 with these changes:
- The form was hidden when no settings were found (first setup) – thus hiding the link to initiate the setup. It was still possible to use ?dfsetup=1 to initialte the setup.
- Whan not using TABS in SP2007, you go a javascript error:
“The value of the property ‘ExecuteOrDelayUntilScriptLoaded’ is null or undefined, not a Function object”
01.11.2012 Updated to v2.5 with these changes:
- Finally, you can rearrange the order of RTE fields in the tabs.
- Initial form visibility set to hidden to prevent flashing all fields before applying rules / tabs (display:none is not used because the dialog size would be distorted).
NOTE: You must update both “DynamicFormsForSharePoint_v2.js” and “default.css”.
19.10.2012 Updated to v2.41 with these changes:
- The action “Set field value” can now pull values from other columns in the current form (in addition to item ID) – as requested by Morten. To include a value from another field, enter the FieldInternalName like this: {Title}.
- Added trigger “The form is saved”. This trigger will affect the action “Set field value” only.
- Added password obfuscation as requested by Matthias.
15.10.2012 Updated to v2.4 with these changes:
- Minimum dialog width (SP2010) set to 700px in default.css.
- The variable “_spUserId” is changed to “_spPageContextInfo.userId” in SP2010 as some users are missing the “_spUserId” variable in their master page.
- The edit link was previously only visible for the person who first set up the solution. It is now visible for all users. Protect the settings with the built in password functionality.
- Added a fix to handle multiple single item lookup columns with more than 20 items in different tabs (in IE). The problem was that the options “dropdown” sometimes did not render.
- To fix the problem when adding more than 2 rich text or enhanced rich text columns (in SP2007 only) broke the script, I have disabled the ordering of those field types completely. Put them in the top or bottom of the form (using list settings).
- Added “Is in group trigger”.
- Added single choice lookup columns as trigger.
- Added show or hide tabs by rule option.
The changes are in the files “DynamicFormsForSharePoint_v2.js” and “default.css”.
18.08.2012 in v2.3:
- Added option to show a tab only for members in selected SharePoint groups.
- Fixed a bug in date columns when you type in the value, in combination with the “alert validation message option”.
15.08.2012 in v2.2:
- Added option to alert the validation message.
- Added support for “All fields tab” – to enable, add a tab with no fields.
- Enabled solid color table background – same color as the selected tab. To disable, remove line 51-63 in the default.css file.
14.08.2012 In v2.1: Changed the “Orphan fields” handling by adding a checkbox “Show orphan fields in a separate tab” in the tabs configuration, ensured compatibility with Christophe’s Easy Tabs and changed the tab position in non-dialog forms in SP2010.
This is a follow up on Dynamic Forms for SharePoint: Production, and describes the new features – including the integration with Tabs for SharePoint forms. Please refer the previous article for an introduction to the solution.
Some of the changes:
- Integrated with the Tabs for SharePoint forms solution. You can now rearrange the order of the fields in the tabs (not true for rich text fields).
- Added option to hide save item button based on a rule.
- Added option to apply a rule if the current user is not the author of the item.
- Added option to set a field value based on a rule.
- Added support for handling the content type selector (hide, read only, set value).
- Added option to hide the attachments, or set them as read only (hide the “delete link”).
- Added option to show a validation message when applying a rule.
- Setting a field as read only now shows the field description as well.
- Some bugfixes
The solution is still compatible with both SharePoint 2007 and 2010.
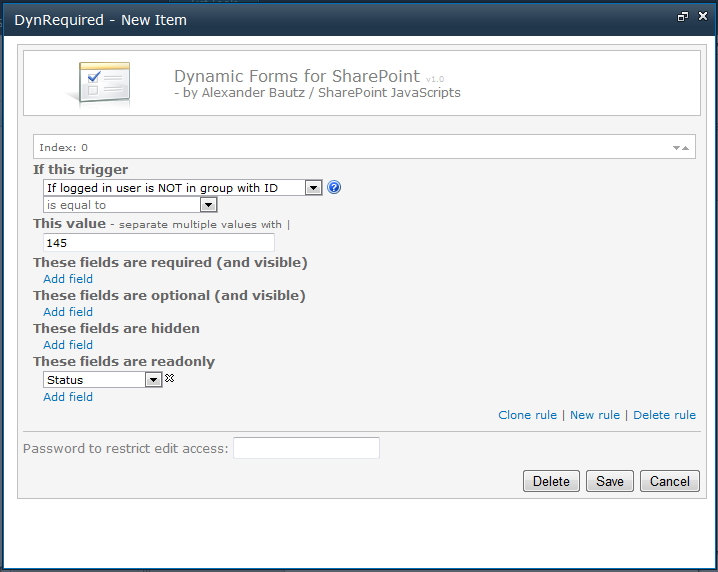
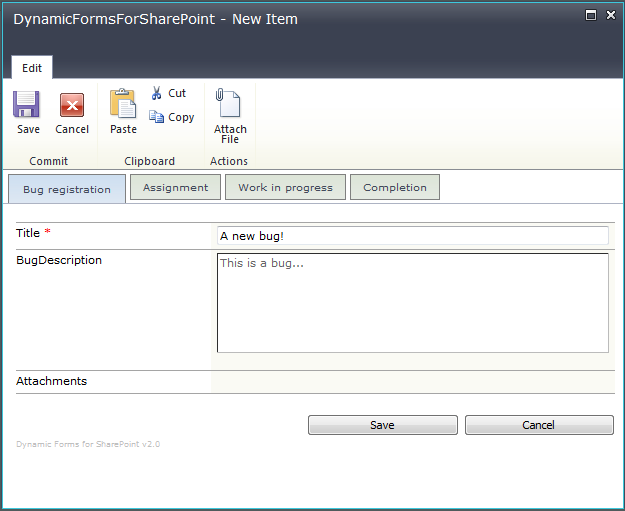
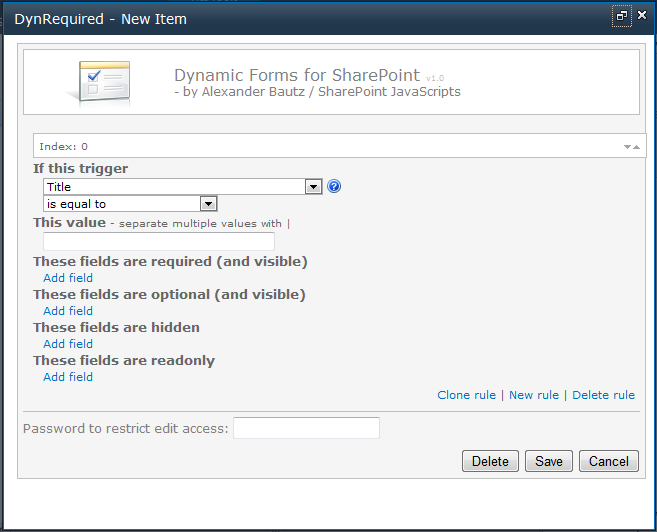
Rule configuration
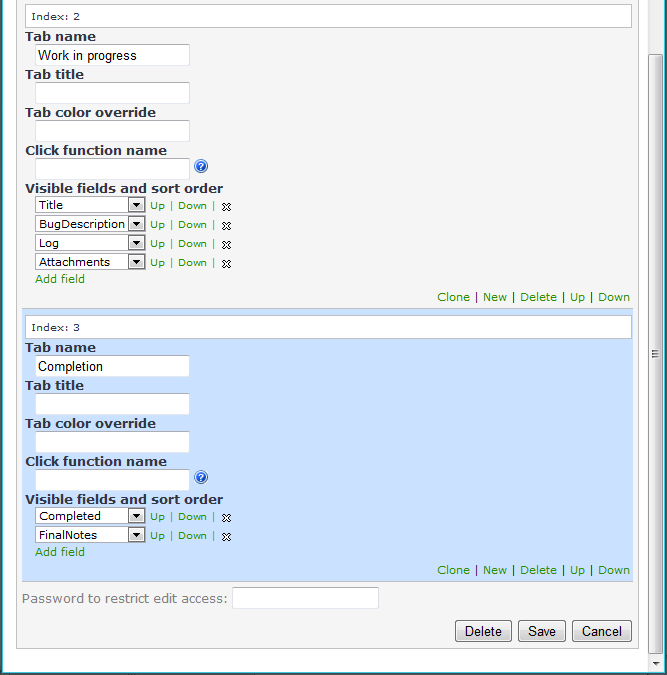
Tab configuration

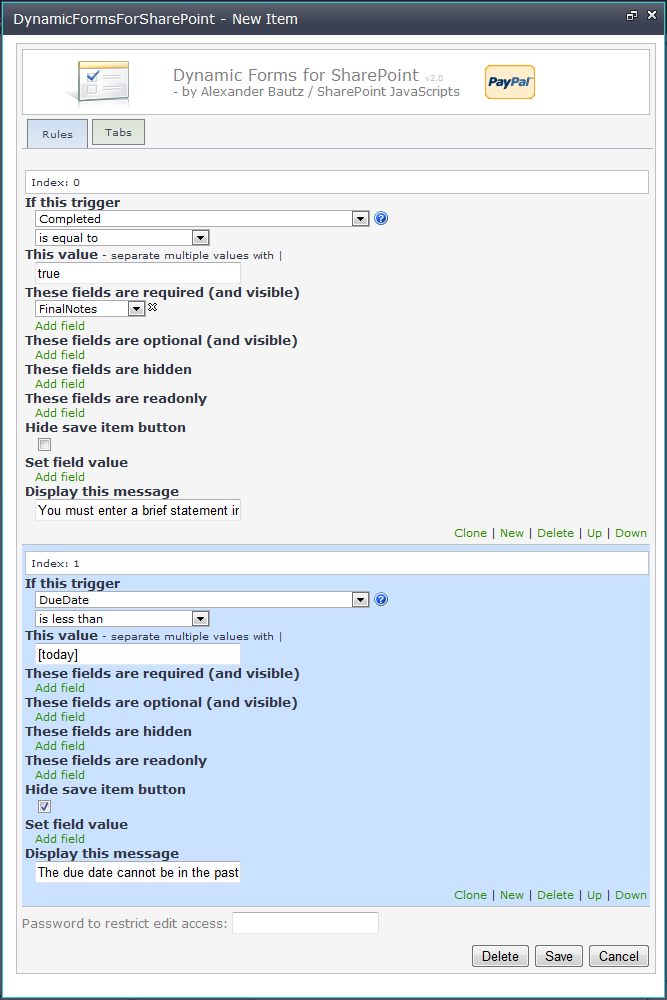
DueDate rule
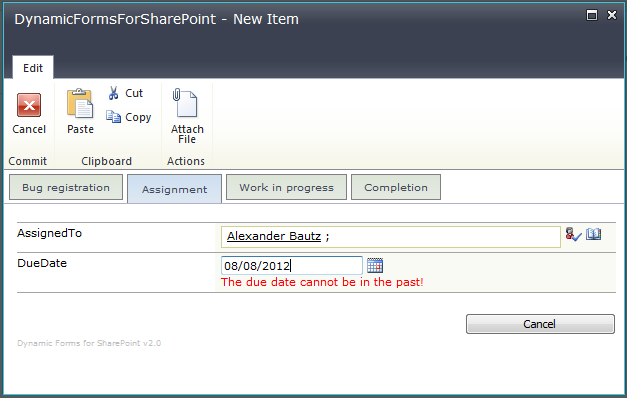
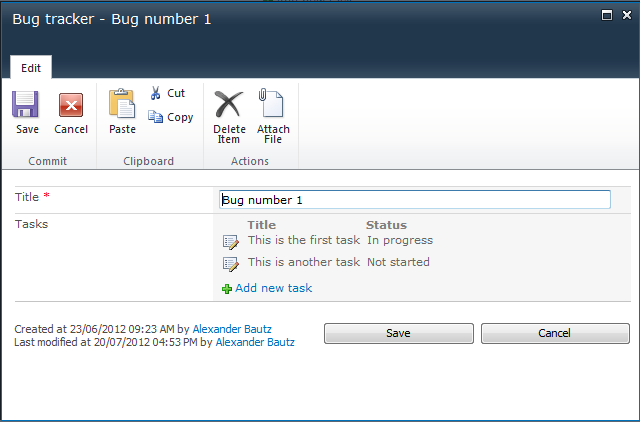
I have entered a date in the past to demonstrate the validation. Note that the save item button has disappeared.
Complete task rule

When clicking the “Completed” checkbox, the “FinalNotes” field is set as required, and the label “You must enter a brief statement in the field below.” is shown.
You can decide whether you want to use both features, or just one of them. Simply delete the last rule or tab configuration to disable that module.
Please refer this article for setup details.
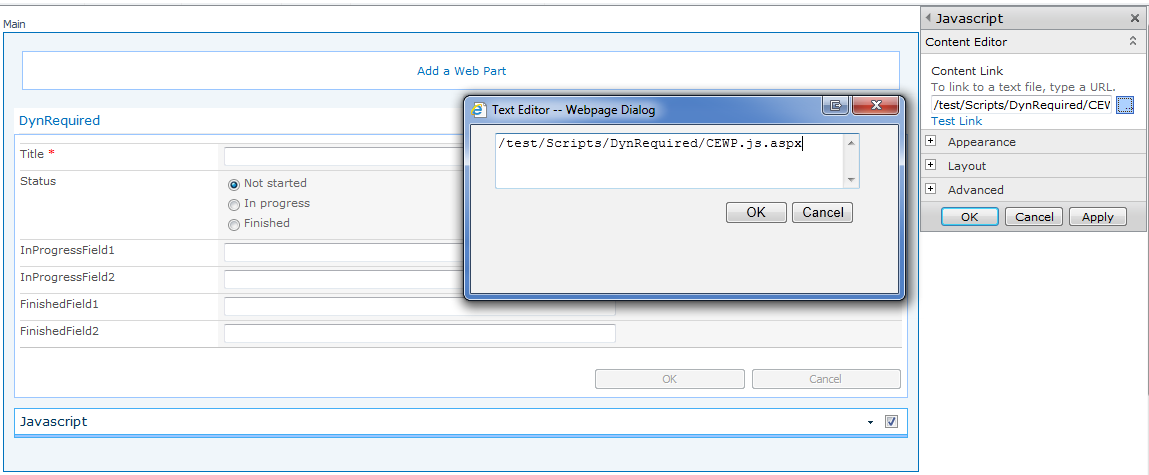
There are one change to the CEWP code as you now have to refer a css-file. You also have to add an image to the same folder as the css file. This is used to add a gradient color to the tabs.
Download the files
Get jQuery here.
Get the Dynamic Forms For SharePoint files here.
Ensure you pick v2.0 or above. The image “gradient.png” must be placed in the same location as the file “default.css”.
You must also upgrade spjs-utility.js. Get spjs-utility.js v1.11 or above here.
The CEWP code:
You must change the “script src” and the “css href” to reflect your locale files.
<link type="text/css" href="https://files.spjsworks.com/files/DynamicFormsForSharePoint/v2.1/default.css" rel="stylesheet" />
<script type="text/javascript" src="https://ajax.googleapis.com/ajax/libs/jquery/1.7.2/jquery.min.js"></script>
<script type="text/javascript" src="https://files.spjsworks.com/files/spjs-utility/v1.11/spjs-utility.js"></script>
<script type="text/javascript" src="https://files.spjsworks.com/files/DynamicFormsForSharePoint/v2.1/DynamicFormsForSharePoint_v2.js"></script>
I spend a lot of time developing these solutions. Hit the PayPal button to keep me motivated!
Post any bugs or comments below.
Alexander


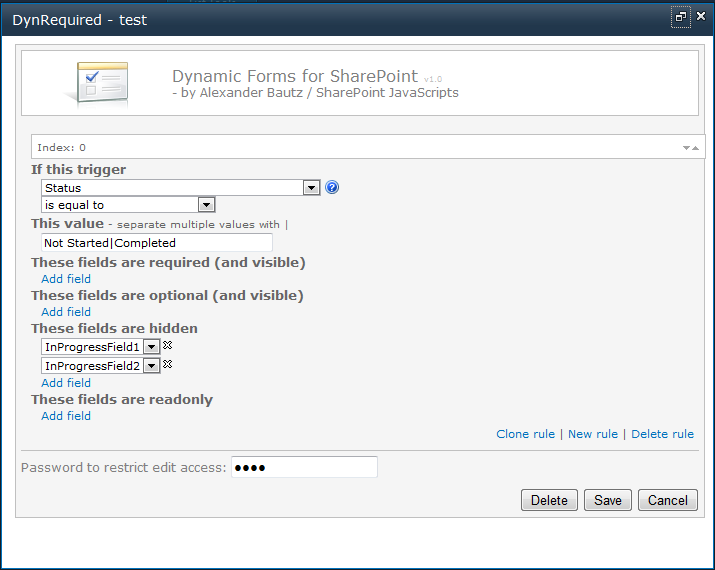


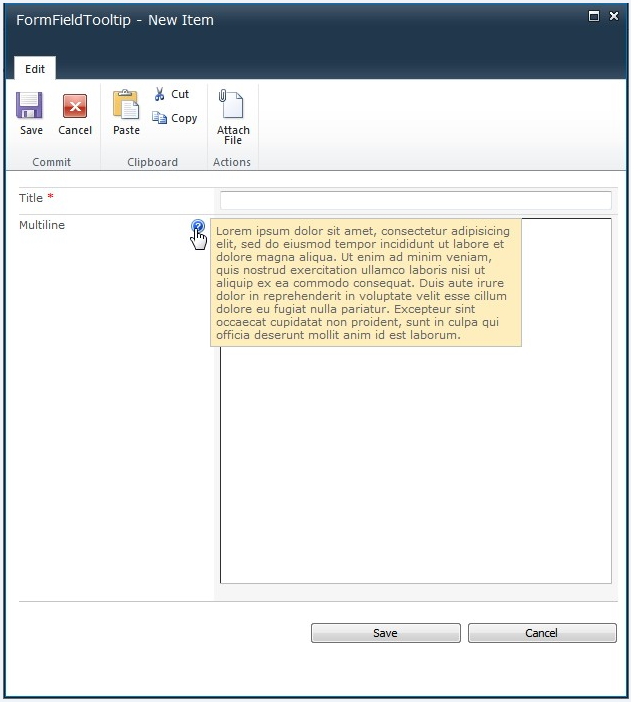
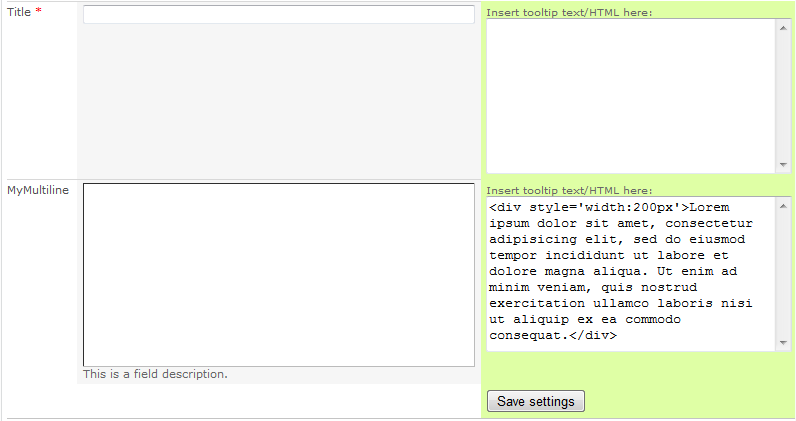
 in the GUI to get some hints on how to set up the rules for each field type.