Have you ever wanted to:
- have multiple document templates in i one document library
– without having to use content types?
- use the same template in multiple document library’s?
- have different document templates available in each view?
- have easy access to editing the templates?
I will provide a javascript solution that uses a standard document library as a master template placeholder. This library can have an unlimited number of templates and each template can be used in multiple document libraries. On each template you can specify which document library to use it in, and whether to use the template in all views, or to specify which views to use it in.
Then, in the document library where you want to use these templates, just drop a CEWP with some script references and like magic – your templates appear. No need to hand code each menu item – they are pulled straight from your master template library based on your metadata on each template.
As always we start like this:
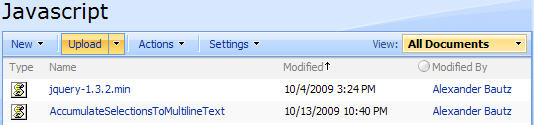
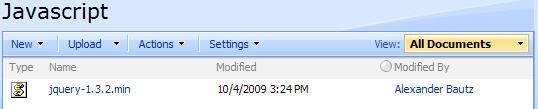
Create a document library to hold your scripts (or a folder on the root created in SharePoint Designer). In this example i have made a document library with a relative URL of “/test/English/Javascript” (a sub site named “test” with a sub site named “English” with a document library named “Javascript”):
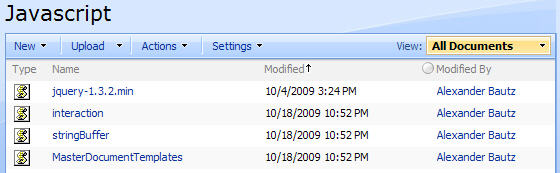
The jQuery-library is found here. The pictures and the sourcecode refers to jquery-1.3.2.min. If you download another version, be sure to update the script reference in the sourcecode.
The scripts “interaction.js” and “stringBuffer.js” is created by Erucy and published on CodePlex.
The sourcecode for “MasterDocumentTemplates.js” is provided below.
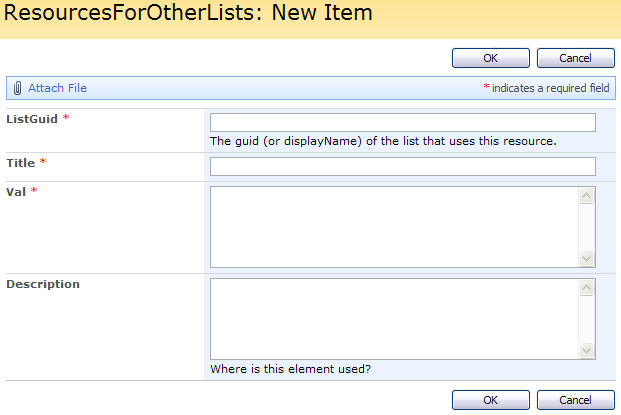
Create your master template placeholder library like this:
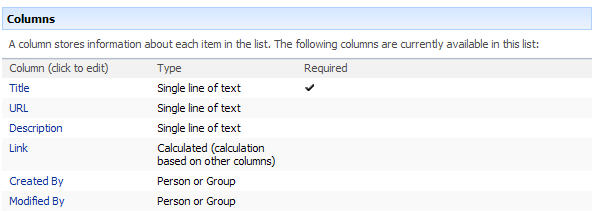
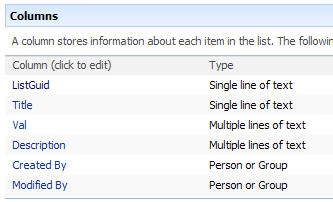
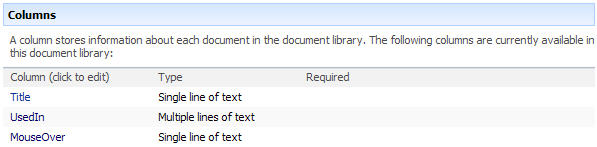
Create a standard document library and add two columns:
UsedIn of type “Multiple lines of text”
Here the document library’s where the template will be accessible is specified like this:
– DisplayNameOfYourLibrary|viewNameFromURL;
– You can add multiple libraries and multiple views for each library – separated by “|” for each view, and “;” for each library.
MouseOver of type “Single line of text”.
Here the description (in “bigIcon-mode”) or MouseOver (in “smallIcon-mode”) on the template in the dropdown is set.
The columns in the template library looks like this:
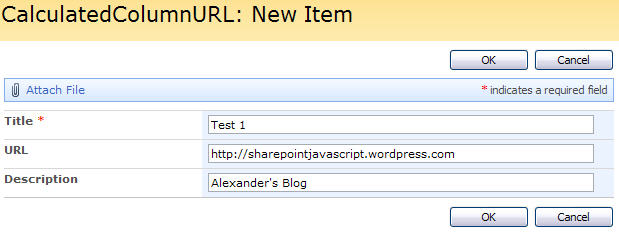
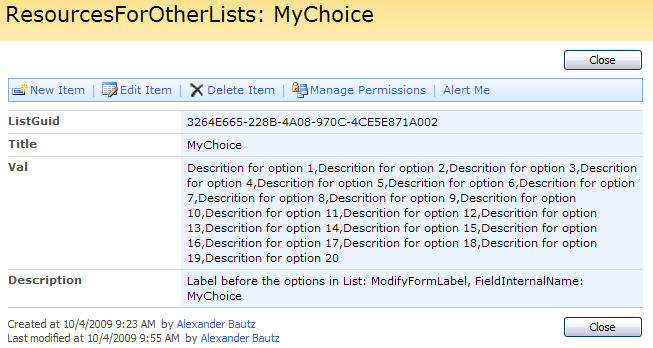
And the template library look like this with a few templates added:
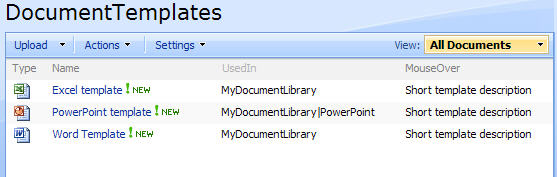
As you see from the screenshot – all templates is used in the document library named “MyDocumentLibrary”. The file “PowerPoint template” is visible only in the view “PowerPoint” in “MyDocumentLibrary”. The rest of the templates is visible in all views.
Here is the code for the file “MasterDocumentTemplates.js”:
/* Add dropdown menu in document library - pulls templates from master template library and points "save" to the current library
 * Requires a "Templates" document library with the following fields (FieldInternalName):
 * "UsedIn"
 * - Multiple line of plain text. Here the document library's where the template will be accessible is specified like this:
 *   DisplayNameOfYourLibrary|viewNameFromURL;
 *   You can add multiple libraries and multiple views for each library - separated by "|" for each view, and ";" for each library.
 *   If you do not specify view - the template is accessible to all views that have this script referred.
 * "MouseOver"
 * - Description (in "bigIcon-mode") or MouseOver (in "smallIcon-mode") on the template in the dropdown
 *
 * -----------------------------
 * Author: Alexander Bautz
 * Version: 1.2
 * LastMod: 18.10.2009
 * -----------------------------
 * Must include reference to jQuery and to the folloving scripts (http://spjslib.codeplex.com):
 * ----------------------------------------------------
 * interaction.js
 * stringBuffer.js
 * ----------------------------------------------------
Ex:
getTemplatesForThisLibrary('DocumentTemplates','/test/English','',true,true,'Upload document','Select template from list');

Parameters explained:
* templatesListName:
  Document library DisplayName of your master template library
* templatesListbaseUrl:
  The baseUrl of the site the library resides in (not the URL to the Document library it selves)
* targetListUrlDir:
 The actual URL path to the save location - to save in "current" library - where the menu is - use ''
* bigIcon:
 true for large icon and description (from field "MouseOver") below the template name
 false for small icon mode with the value from the field "MouseOver" as tooltip and only the template name visible
* uploadOption:
 true add option for upload
 false hides option for upload
* uploadButtonTitle:
 if uploadOption set to true - the text displayed on the upload "option"</li>
* menuTitle:
 The text on the dropdown-menu
*/

function getTemplatesForThisLibrary(templatesListName,templatesListbaseUrl,targetListUrlDir,bigIcon,uploadOption,uploadButtonTitle,menuTitle){
var bgColor = $('.ms-quicklaunchheader').css('background-color');
var btnBgColor = $('.ms-viewselector').css('background-color');
var thisViewNameRaw = $("#aspnetForm").attr('action');
var thisViewName = thisViewNameRaw.substring(0,thisViewNameRaw.indexOf('.aspx'));

wsBaseUrl = templatesListbaseUrl + '/_vti_bin/';
var q = "<Where><Contains><FieldRef Name='UsedIn'/><Value Type='Text'>" + ctx.ListTitle + "</Value></Contains></Where>" +
		"<OrderBy><FieldRef Name='FileLeafRef' Ascending='True'/></OrderBy>";
var links = '';
if(bigIcon){
	var iconPrefix = 'lg_';
	var menuClass = 'ms-MenuUILarge';
	var uploadIMG = 'menuuploaddocument.gif';
}else{
	var iconPrefix = '';
	var menuClass = 'ms-MenuUI';
	var uploadIMG = 'doclink.gif';
}

var res = queryItems(templatesListName,q,['UsedIn','FileLeafRef','MouseOver','DocIcon'],25);
	if(res.count>0){
		if(targetListUrlDir==''){
			var listURLRaw = ctx.listUrlDir;
			var listUrl = listURLRaw.substring(listURLRaw.lastIndexOf('/'));
		}else{
			listUrl = "/" + targetListUrlDir;
		}
	    $.each(res.items, function(idx, item){
	    var showInView = false;
	    // Split the UsedIn value to separate the document library names
	    var useInSplit = item['UsedIn'].split(';');
	        for(i=0;i<useInSplit.length;i++){
	        	// Split the value to find the view's in which to show the template
	       		var usedInSplitAgain = useInSplit[i].split('|');
	       		if(usedInSplitAgain.length>1){ // If length > 1 there is specified one or more views
		       		if(usedInSplitAgain[0]==ctx.ListTitle){
				        for(j=1;j<usedInSplitAgain.length;j++){
			        		if(usedInSplitAgain[j].toLowerCase()==thisViewName.toLowerCase()){
				        		// Show in this view
				        		showInView = true;
				        	}
				        }
					}
				}else{ // View not specified - show in all views
					if(usedInSplitAgain[0]==ctx.ListTitle){
						showInView = true;
					}
				}
	        }

			if(showInView){
		        var DocIcon = item['DocIcon'];
		        var docName = item['FileLeafRef'].substring(item['FileLeafRef'].indexOf(';#')+2);
		        var docDescription = '';
		        var mouseOver = '';
		        if(item['MouseOver']!=null){
		        	var docDescription = "<font color='#696969'>" + item['MouseOver'] + "</font>";
			        	if(!bigIcon){
			        		var mouseOver = item['MouseOver'];
			        	}
		        }
		        var link = "createNewDocumentWithProgID('" + ctx.HttpRoot + "/" + templatesListName + "/" + docName + "','" + ctx.HttpRoot + listUrl + "','SharePoint.OpenDocuments', false)";
				if(bigIcon){
					 links += "<table style='border:1px white' width='100%' cellpadding='2' cellspacing='0' " +
					 "class='templateMenuHover " + menuClass + "' " +
	        		 "title='" + mouseOver + "' onclick="javascript:hideMenu($(this));" + link + "">" +
	        		 "<tr><td style='vertical-align:middle'><img style='text-align:center;vertical-align:middle' src='/_layouts/images/" + iconPrefix + "ic" + DocIcon + ".gif' /></td>" +
	        		 "<td width='100%' style='padding:0 15 0 10'><b>" + docName + "</b><br>" + docDescription + "</td></tr></table>";
				}else{
					 links += "<table style='border:1px white' width='100%' cellpadding='2' cellspacing='0' " +
					 "class='templateMenuHover " + menuClass + "' " +
	        		 "title='" + mouseOver + "' onclick="javascript:hideMenu($(this));" + link + "">" +
	        		 "<tr><td style='vertical-align:middle;padding-left:2px'><img src='/_layouts/images/" + iconPrefix + "ic" + DocIcon + ".gif' /></td>" +
	        		 "<td width='100%' style='padding:0 15 0 10;white-space:nowrap'>" + docName + "</td></tr></table>";
				}
	    	}
	    });
    }else{
    	// No templates available for this view
		 links += "<table style='border:1px white' width='100%' cellpadding='2' cellspacing='0' " +
		 "class='templateMenuHover " + menuClass + "' " + "title=''>" +
		 "<tr><td style='vertical-align:middle;padding-left:2px'><img src='/_layouts/images/" + iconPrefix + "ichlp.gif' /></td>" +
		 "<td width='100%' style='white-space:nowrap;padding:0 10 0 10'>No templates available</td></tr></table>";

    }
    // Show upload option
    if(uploadOption){
		 links += "<table style='border:1px white' width='100%' cellpadding='2' cellspacing='0' " +
		 "class='templateMenuHover " + menuClass + "' " + "title='' onclick='location.href="" + ctx.HttpRoot + "/_layouts/Upload.aspx?List=" + ctx.listName + ""'>" +
		 "<tr><td style='vertical-align:middle;padding-left:2px'><img src='/_layouts/images/" + uploadIMG +"' /></td>" +
		 "<td width='100%' style='white-space:nowrap;padding:0 10 0 10'>" + uploadButtonTitle + "</td></tr></table>";
    }
    // Build the menu
  	links = "<div style='border-top:thin groove white;border-bottom:thin groove white;border-left:thin groove white;background-color:" + bgColor + ";height:25' >" +
  			"<div style='cursor:pointer;float:left;border:thin groove silver;padding:2;background-color:" + btnBgColor + "' class='templateMenuFirst'>" +
  			"<div title='Open Menu'>" + menuTitle + "<img alt='' src='/_layouts/images/menudark.gif'/></div>" +
  			"<div class='templateMenu ms-MenuUIPopupBody' style='display:none'>" + links + "</div>" +
  			"</div>" +
  			"</div>";

    // Insert the menu
	$(".ms-bodyareaframe").prepend(links);
	// Add show-hide functionality to the menu
	addShowHideToCustomMenu();
}

function addShowHideToCustomMenu(){
	// Add onclick and mouseleave to show and hide the menu
	$('.templateMenuFirst').click(function(){
		$('.templateMenu').slideDown(250)
		.css('position','absolute')
		.css('zIndex','1000')
	})
	.mouseleave(function(){
		$('.templateMenu').fadeOut(350);
	});

	// Add hover effect to highlight the element hovered with the mouse
	$(".templateMenuHover").hover(
	function () {
		$(this).addClass('ms-MenuUIItemTableHover');
	},
	function () {
		$(this).removeClass('ms-MenuUIItemTableHover');
	});
}

function hideMenu(obj){
	// Remove rather than hide to prevent flicker
	$('.templateMenu').remove();
	// Reload page - needed for Firefox
	history.go(0);
}

// Overcome the zIndex glitch in IE7 - http://www.vancelucas.com
$(function() {
	var zIndexNumber = 1000;
	$('div.templateMenu').each(function() {
		$(this).css('zIndex', zIndexNumber);
		zIndexNumber -= 10;
	});
});
Save this as a file named “MasterDocumentTemplates.js” – be sure to use the right file extension, and upload to the javascript library as shown above.
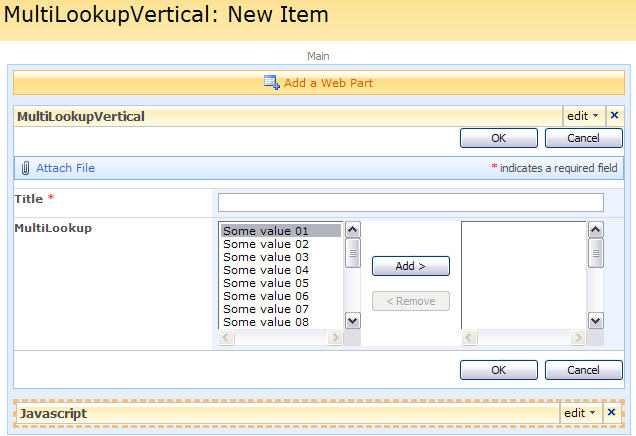
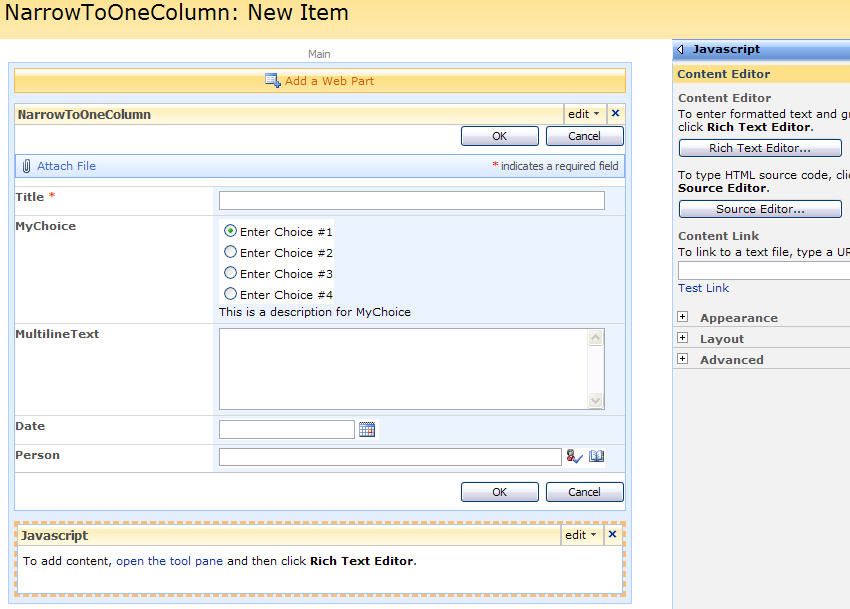
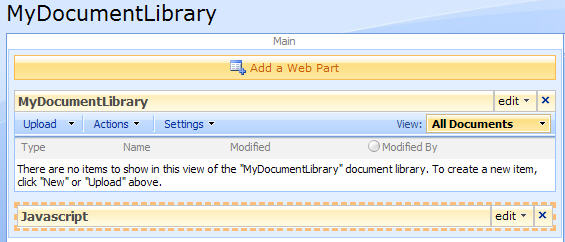
Then add a CEWP below the list view in the document library where you want the menu to appear.
And add this code to it:
<script type="text/javascript" src="/test/English/Javascript/jquery-1.3.2.min.js"></script>
<script type="text/javascript" src="/test/English/Javascript/interaction.js"></script>
<script type="text/javascript" src="/test/English/Javascript/stringBuffer.js"></script>
<script type="text/javascript" src="/test/English/Javascript/MasterDocumentTemplates.js"></script>
<script type="text/javascript">
// bigIcon mode true
getTemplatesForThisLibrary('DocumentTemplates','/test/English','',true,true,'Upload document','Select template from list');
</script>
Parameters explained:
- templatesListName
Document library DisplayName of your master template library
- templatesListbaseUrl
The baseUrl of the site the library resides in (not the URL to the Document library it selves)
- targetListUrlDir
The actual URL path to the save location – to save in “current” library – where the menu is – use ”
- bigIcon
true for large icon and description (from field “MouseOver”) below the template name
false for small icon mode with the value from the field “MouseOver” as tooltip and only the template name visible
- uploadOption
true add option for upload
false hides option for upload
- uploadButtonTitle
if uploadOption set to true – the text displayed on the upload “option”
- menuTitle
The text on the dropdown-menu
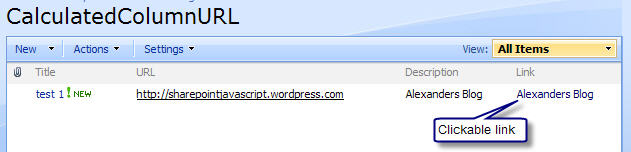
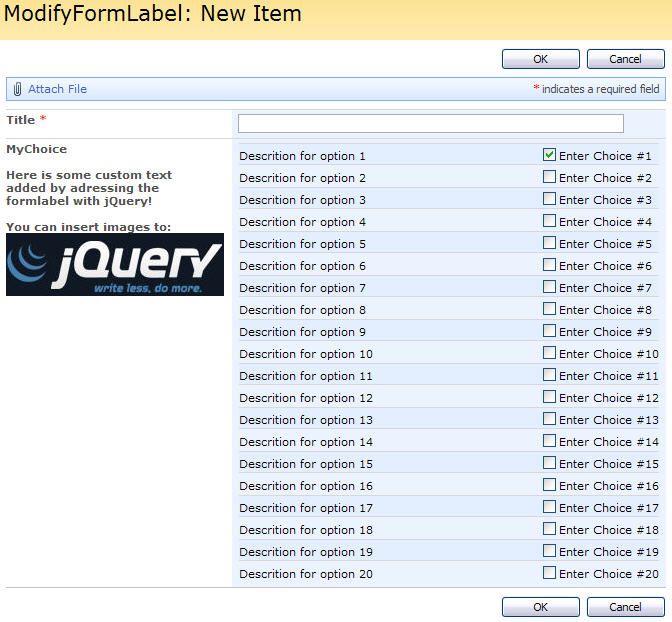
The menu will appear like this:
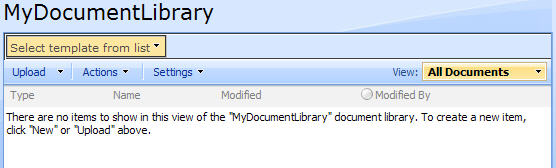
You can edit the color of the “button” and its background “banner” in line 44-45 in the script.
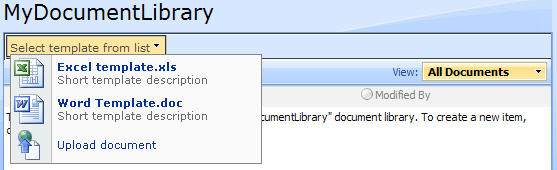
The menu should look like this in the “Default view” (note that the PowerPoint template is not displayed:
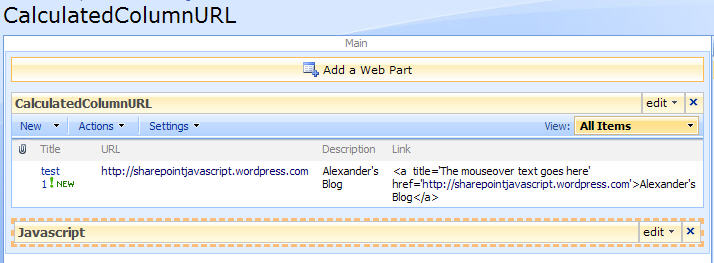
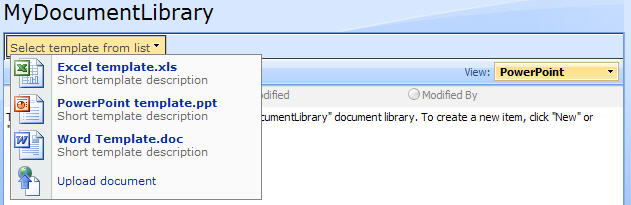
And like this in the view “PowerPoint”:
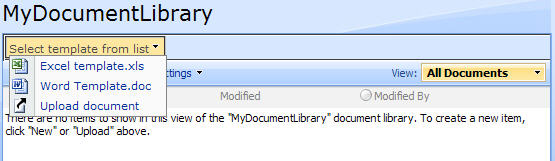
If you select “bigIcon=false” the menu looks like this:
I hope someone finds this “feature” handy!
Ask if something is unclear.
Regards
Alexander
Like this:
Like Loading...