DFFS v4 is compatible with WSS / Moss 2007, 2010, 2013, 2016, 2019, SharePoint SE and SharePoint in Microsoft 365.
The solution is 100% client side, and you can set it up with only “Design” or “Owner” rights to the SharePoint Site.
If you are looking for the Modern DFFS for SharePoint in Microsoft 365 you can find it here: https://spjsworks.com
Install DFFS
If you are unable to proceed with the Classic DFFS installation due to the absence of the Media and Content section or the Content Editor Web Part in Step 6, this suggests that scripting is disabled. To resolve this, please reach out to your IT department and request that they enable custom scripting capabilities for your site.
Add a document library named SPJS to your site by going to Site content > New > Document library.
Step 3
Upload the DFFS folder to the document library created in step 2. Ensure you upload the entire folder and not just the contents – the SPJS document library should look like this:
Step 4
Create a web part page to add the DFFS installer to by going to Site content > Site pages > New: Web Part Page
If you do not see the option “Web part page” on the New button you can go to Site contents and change the URL from this:
/Sites/YourSite/_layouts/15/viewlsts.aspx?view=14
To this:
/Sites/YourSite/_layouts/15/spcf.aspx?view=14
Step 5
Name the web part page for example DFFS_Installer and select SPJS as Save Location in the dropdown at the bottom of the page. Hit OK and you should be redirected to the new page in Edit mode.
Step 6
On this new page, add a webpart by clicking one of the Add a Web Part buttons on the page.
Step 6a
Select the Category Media and Content and the web part named Content Editor and hit Add to add it to the page.
Step 6b
Hover over the new webpart and click the little down-arrow in the top right corner and select Edit Web Part to open the web part properties.
Step 6c
In the Content Link field type in the address to the DFFS_Installer_v2.html file like this – change only the /sites/URL_of_your_site/ part of the URL to match your site:
Optionally you can set Chrome type to None in the Appearance section.
Step 6d
Hit OK to save and close the web part properties and then click the Stop Editing button in the top left corner of the page.
Now you should see the DFFS installer web part on the page. If not, ensure you have the correct URL to the DFFS_Installer_v2.html file in step 6c.
Step 7
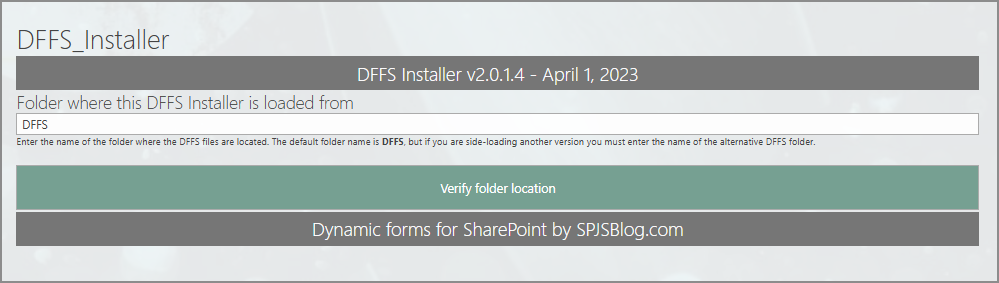
The DFFS installer shows this screen the first time after installation:
Click the Verify folder location button to update the installer / loader files and the page will reload, showing the DFFS intaller.
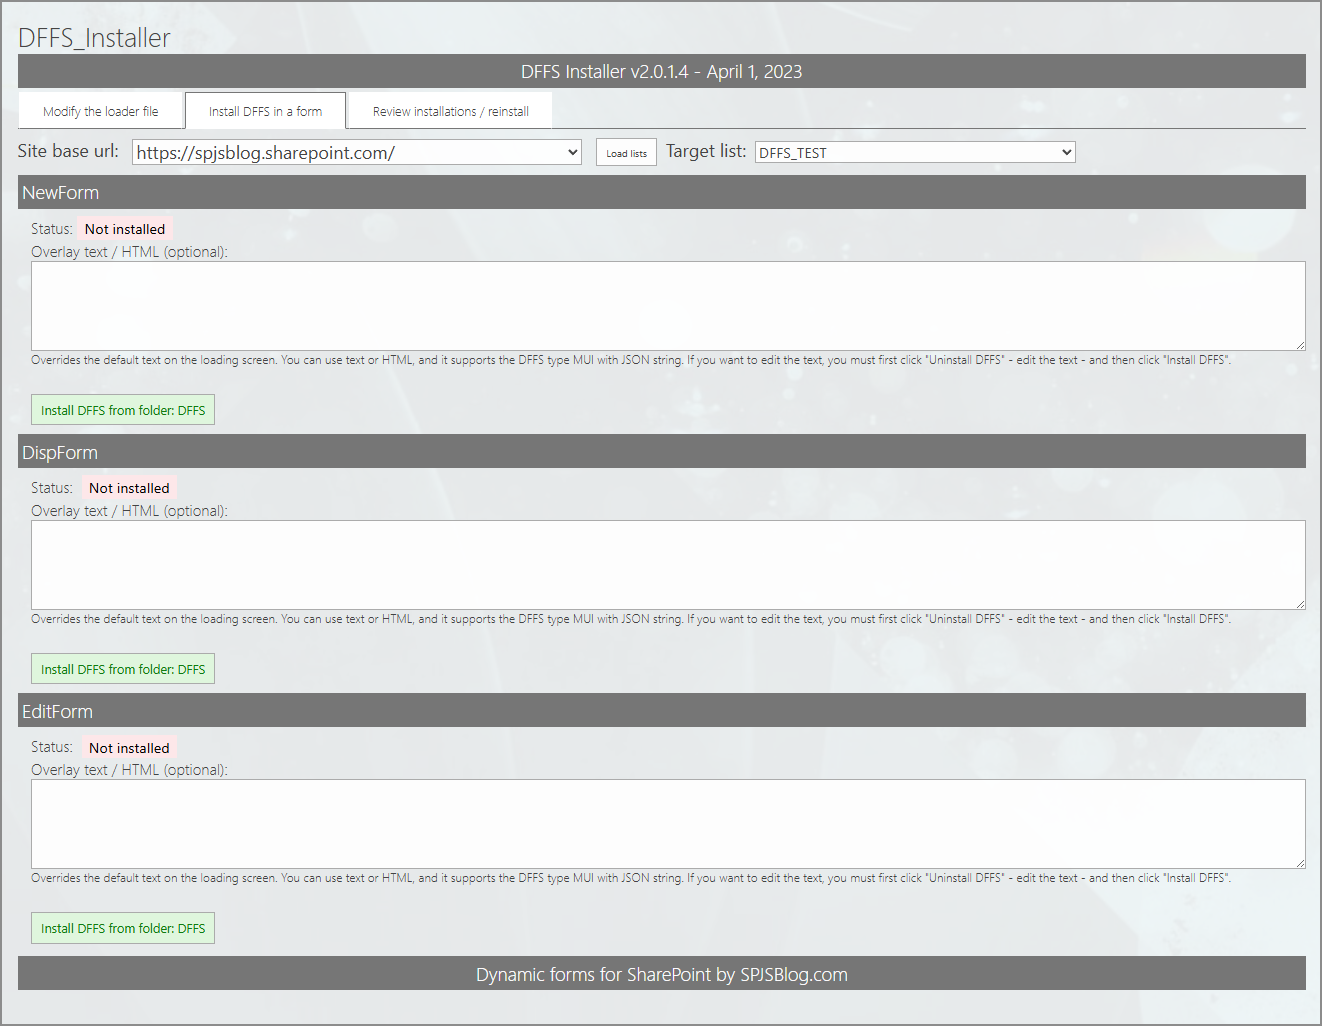
Select the site from the dropdown, hit Load lists and select the target list from the second dropdown. Hit the green Install DFFS from folder: DFFS button to install DFFS in each of the forms.
NewForm = Add new item form
DispForm = View existing items form
EditForm = Edit existing items form
Upgrading from a previous version of v4.x
When you have DFFS installed and want to update to a later version, follow these steps.
Download the latest files as shown in step 1 in the Install DFFS section above and unzip the file.
Open your SPJS document library and DELETE the DFFS folder. Do not rename it or back it up as this will cause problems with your existing forms. The configurations for your forms are not stored in this folder and you don’t need to back it up.
Upload the new DFFS folder you downloaded in step 1 to the SPJS document library.
Open the DFFS installer web part page you created in step 4 of the Install DFFS section above and on the first tab, “Modify the loader file”, hit the large green button “Update loader file”.
This is it, you are done updating your DFFS version to the latest version for all forms that used this DFFS folder.
Other installation or upgrade options
Upgrading from an older version 3.x
Dynamic Forms for SharePoint v4.x is backwards compatibility with DFFS v3.x, but if you are upgrading from an early 3.x version, you must edit each of the forms DFFS configuration after updating to ensure your rules still work properly. This is because some of the updates may have changed how some rules are processed.
You should always test a new version in a development site or in a copy of the list to ensure it works as expected.
If you decide to test it in a production environment, you must at least back up the configuration before you start. You can export the setup from the “Misc” tab (moved to Export, import and restore tab in later versions).
Upgrading from v3.x will require that you reinstall DFFS by using the “local installer” as described below. It will also require that you enter the DFFS config for each form to ensure your rules are correctly set up.
This will most likely only affect rules set up on multiselect fields as the configuration for this type of rule has changed to give you a list of the options to choose from rather than a text filed to write the options in.
Please look at the Install two or more different versions in parallel below to learn how to install the new DFFS version in parallel with the old version. This will let you upgrade safely by reinstalling one form at the time.
If you have trouble, look at the troubleshooting section at the bottom of this document.
The installer will detect any existing JSLink (really old install method) or older CEWP installations, and will let you remove this directly to replace it with the new DFFS Installer.
Install two or more different versions in parallel [advanced]
To side-load a different version using the DFFS installer v2, just create a new folder in the SPJS document library – for example DFFS_v4.4.5.54 and then follow the DFFS installer section Step 4 – Step 8, but replace the folder DFFS in Step 6c with the new DFFS folder you created.
When you install DFFS using this new installer it will use the DFFS version from your DFFS_v4.4.5.54 folder.
CDN Installer [advanced]
There is a DFFS Installer that lets you use your own Azure CDN to load the DFFS files and optionally host the DFFS and vLookup config. To use this new installer you must add a document library named SPJS to your site collection root site and add a folder named DFFS. In this folder you must add the file /SPJS/DFFS/installer/DFFS_Installer_CDN.html from the DFFS file package.
Now add a web part page to your SPJS library and add a link to /SPJS/DFFS/installer/DFFS_Installer_CDN.html.
Set up your CDN
You must have an Azure blob storage (or other CDN) to use this – upload the DFFS folder to this CDN – for example in a blob container named spjs like this:
Ensure your blob container has CORS set up and that GET – Allowed origins = * on the storage account. Also ensure that “Public access level” = “Blob (anonymous read access for blobs only)” is configured.
Load the DFFS and vLookup configurations from you CDN:
You can export your existing DFFS and vLookup configurations using the third tab in the installer. Upload them to this folder in your CDN:
Please note that the configurations for the root site is added directly to the /BLOBS folder, but that configurations for any subsites must be added to a subfolder like this:
The loading overlay has the default max time before “This tool forever” shows set to 6000 (60 seconds).
You can now override this loading overlay timeout entirely (if you know your form uses longer than 60 seconds to load) by adding this to the custom js in each DFFS enabled form:
clearTimeout(dffs_overlay_timeout);
License code
Buy the license first
If you don’t already have a valid license you want to upgrade, you must buy a license first. Then generate and send the challenge codes to the address you find in the page where you generate the code.
License code challenge for site or site collection
This step in used only for site or site collection scoped licenses. If you have a Company license of any sort, this step is not used and you can paste the license code you got when you purchased DFFS directly in the “License code” textarea.
When you have installed DFFS, go to one of the DFFS enabled forms and open the “License” tab. There you will find a button named “Click this button to generate the challenge code”.
You must send both the SITE and SITE COLLECTION challenge codes.
What is the challenge code created from?
This code is a “hash” of the site collection URL.
Why is this necessary?
This challenge-response-routine is used to ensure this license is not used in more than one site or site collection (depending on the license type).
How is the license code validated?
There is no “phone home” to validate any of the license types. This is done locally in the DFFS JavaScript files.
License code textarea
When you have receive the license code, you paste it in this textarea and hit Save license code.
Upgrade an existing license
If you encounter validation issues with your existing DFFS license code when using a new version, please send me the old license code so I can update it. Please be aware that site or site collection licenses are bound to the sites they were initially activated on, and changing the challenge code will not transfer the license.
If you have an older license, please contact me to see what kind of update options you have.
Manage the license code centrally
This option should NOT be used with a site license.
In the installer v2.0.0.6 and above you can add the license code in a text file located here: /SPJS/DFFS/loader/DFFS_License.txt.
Please note that ONLY the license code string must be added to this file. This will prefill the license code in the License code field in the setup page of the DFFS Installer. The Update loader file button must be clicked to write the license code to the proper location.
This will be a way of preloading the license if you have a company license and want to make a template out of the SPJS document library to ease the setup process in new site collections.
You can also add the license code in the DFFS Installer Modify the loader file > License code.
Developer license
If you buy a site collection license or better you can request a developer license for use in a DEV or UAT environment. This license is fully functional, but has a banner below the form showing that it’s not for production use.
Troubleshooting
Problem
Solution
I have updated from a previous version and the configuration will not load.
Hit F12 in the browser to bring up the developer console. Select “Console” and reload the web page to look for errors.
Report any errors to the email address found in the “File a bug reports” section below.
When you have filed the bug report, roll back to the previous version of the script while waiting for my response.
If you have saved the configuration already, look at the next “problem” below.
I have saved the configuration, but now it is corrupted.
The “last good configuration” is automatically preserved. You can roll back like this:
Go to the configuration list in all site contents.
Locate the correct form.
Edit the list item and copy from “lastGoodConfig” to “blob”.
Reload the form to verify that it is OK.
I have an InfoPath form, or a form customized in SharePoint Designer and I cannot get DFFS to work.
Sorry, but DFFS is designed for out of the box SharePoint forms and although you might get it working for a customized form, I cannot help you with it.
Nothing happens, or the overlay shows “This took forever”.
Ensure you have referred all the scripts correctly. Try the script src or the css href link in the URL field of the browser to verify it is correct.
Hit F12 in the browser to bring up the developer console. Select “Console” and reload the web page to look for errors.
If you see ‘$’ is undefined you are missing a reference to jQuery.
If you receive another error message that you do not know how to handle, please send it to the email address found in the “File a bug reports” section below.
It works for me, but not for the other users.
Ensure all users have read access to the SPJS document library where you uploaded the files.
All the scripts are OK, the overlay flashes and disappears, but the button to enter the setup does not show.
Hit F12 to see if you see any errors in the console. If not, try uninstalling and reinstalling DFFS in this form (your configuration will not be affected).
You get a 404 error on lists.asmx in the F12 Console and DFFS fails to load
There is a know incompatibility with Infowise Smart List Pro used ON PREMISES (Office 365 is not affected) because this solution modifies the shared /_vti_bin/lists.asmx file. This is not a DFFS specific issue, but affects all calls to /_vti_bin/lists.asmx (webservice calls).
The solution is to uninstall Infowise Smart List Pro.
Other issues?
Search the forum for a solution, or post a new topic.