23.04.2011 Yet another article about the same topic can be found here
21.11.2009 A new article describing another method for redirecting a user to a custom page on “OK” and another page on “Cancel” is found here. This method is a good replacement for the “simple redirect” described in this article.
I have struggled a bit trying to redirect the user from NewForm to EditForm of the same list item – midway in filling the form. The reason i wanted to do this was to have access to the item ID when proceeding with the rest of the form fields (to make a relation between this list item and an item in another list).
I ended up using a brilliant solution called sessvars, from a guy named Thomas Frank. Read about it and get the sessvars.js here.
This technique can also be used to “redirect” the user to a custom “Thank you for participating…” – page after filling the form and clicking the “OK” button. I will provide examples of both methods.
In both examples you begin like this:
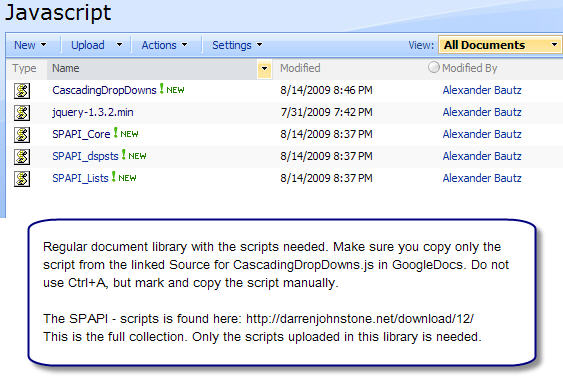
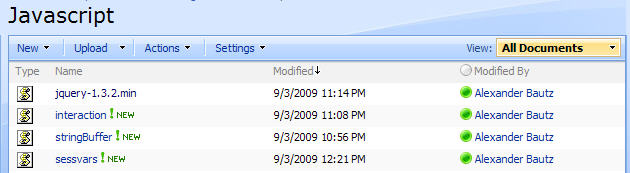
Create a document library to hold your scripts (or a folder on the root created in SharePoint Designer). In this example i have made a document library with a relative URL of “/test/English/Javascript” (a subsite named “test” with a subsite named “English” with a document library named “Javascript”):

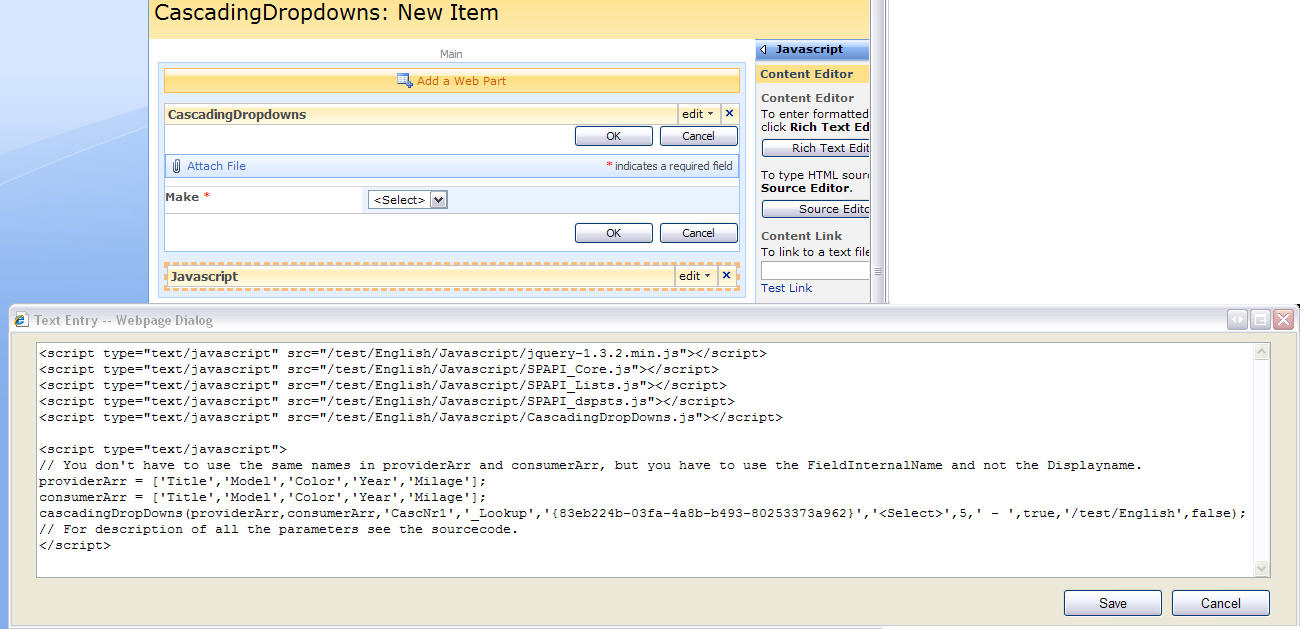
A simple redirect from NewForm to a “Thank you for submitting” – page can be done like this.
Add a CEWP below the listform in NewForm and add reference to the scripts like this:
The variable “sessvars.targetUrl” is set in a function called PreSaveAction which is always called when you click the “OK-button”. It must return true for the item to be saved. When this variable is set in this function, it is only set if the user actually saves the list item and not if the user clicks “Cancel”. this overcomes the problem with adding a ?Source=/test/English/ThankYou.aspx to the URL – which would redirect the user even if he clicks “Cancel”.
<script type="text/javascript" src="/test/English/Javascript/sessvars.js"></script>
<script type="text/javascript">
function PreSaveAction(){
  sessvars.targetUrl = '/test/English/ThankYou.aspx';
return true;
}
</script>
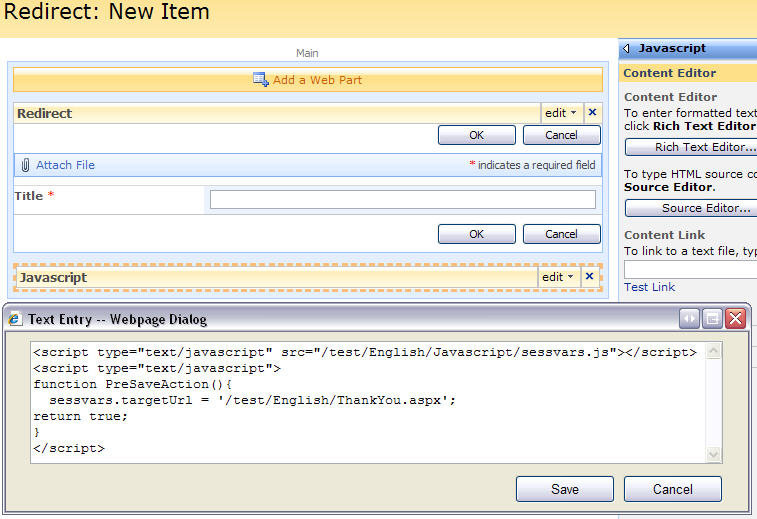
Then you have to add a CEWP to the standard view of your list (the view you normally would be redirected to after saving a list item if you have no ?Source= in the query string of your URL):
This code checks if the variable “sessvars.targetUrl” is defined, and redirects the user to the specified address. Note that right before the redirect, the variable is cleared with “sessvars.$.clearMem()”, to prevent the user from getting redirected multiple times.
<script type="text/javascript" src="/test/English/Javascript/sessvars.js"></script>
<script type="text/javascript">
var targetUrl = sessvars.targetUrl;
if(targetUrl!=undefined){
  sessvars.$.clearMem();
  window.location.href = targetUrl;
}
</script>
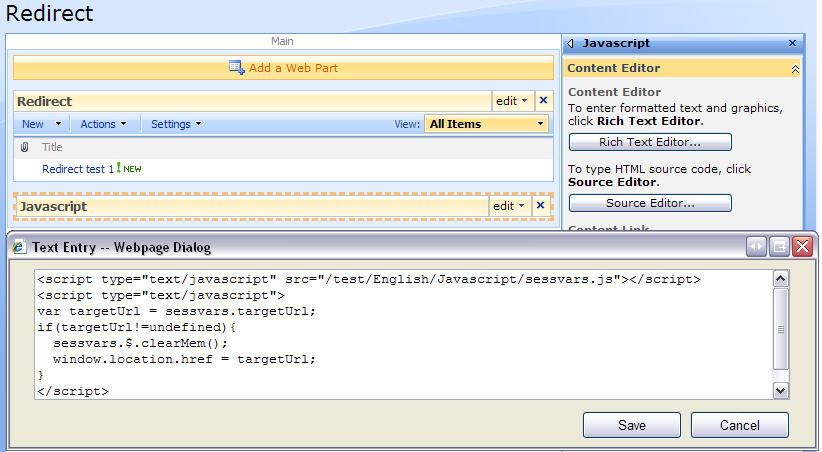
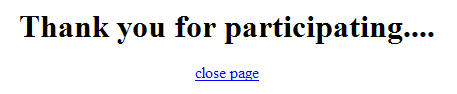
When the user adds a new item to the list, he is redirected to the URL specified in the variable “sessvars.targetUrl” like this:
A redirect from NewForm to EditForm can be done like this:
Like in the example above, add the necessary scripts:
Here i have used some new scripts published on CodePlex by a user named DuWei. Get them here. I have used interaction.js and stringBuffer.js in this example.
Add a CEWP to the NewForm with this code:
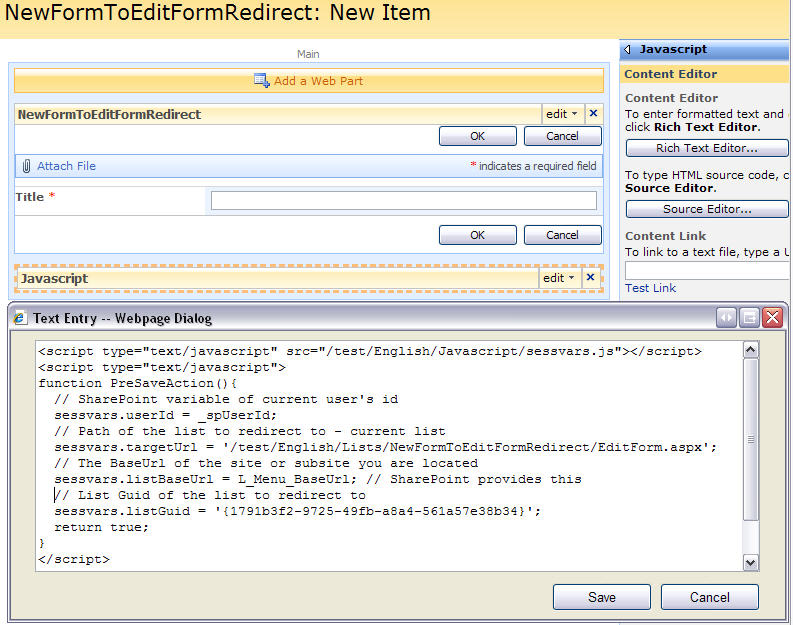
You have to provide the URL to EditForm.aspx, and the list GUID of the list.
<script type="text/javascript" src="/test/English/Javascript/sessvars.js"></script>
<script type="text/javascript">
function PreSaveAction(){
  // SharePoint variable of current user's id
  sessvars.userId = _spUserId;
  // Path of the list to redirect to - current list
  sessvars.targetUrl = '/test/English/Lists/NewFormToEditFormRedirect/EditForm.aspx';
  // The BaseUrl of the site or subsite you are located
  sessvars.listBaseUrl = L_Menu_BaseUrl; // SharePoint provides this
  // List Guid of the list to redirect to
  sessvars.listGuid = '{1791b3f2-9725-49fb-a8a4-561a57e38b34}';
  return true;
}
</script>
Then you add a CEWP to the standard view of your list:
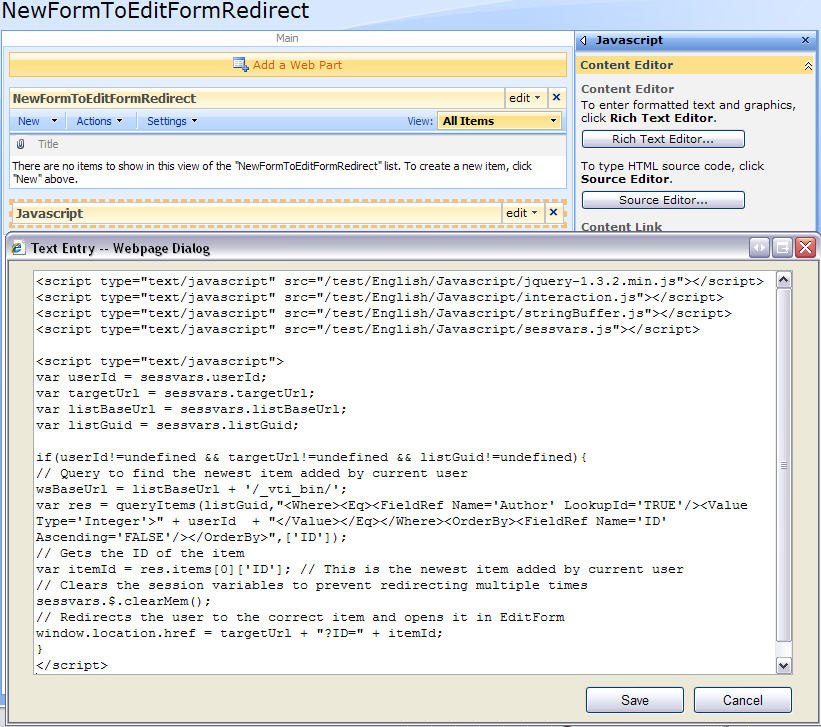
<script type="text/javascript" src="/test/English/Javascript/jquery-1.3.2.min.js"></script>
<script type="text/javascript" src="/test/English/Javascript/interaction.js"></script>
<script type="text/javascript" src="/test/English/Javascript/stringBuffer.js"></script>
<script type="text/javascript" src="/test/English/Javascript/sessvars.js"></script>

<script type="text/javascript">
var userId = sessvars.userId;
var targetUrl = sessvars.targetUrl;
var listBaseUrl = sessvars.listBaseUrl;
var listGuid = sessvars.listGuid;

if(userId!=undefined && targetUrl!=undefined && listGuid!=undefined){
// Query to find the newest item added by current user
wsBaseUrl = listBaseUrl + '/_vti_bin/';
var res = queryItems(listGuid,"<Where><Eq><FieldRef Name='Author' LookupId='TRUE'/><Value Type='Integer'>" + userId  + "</Value></Eq></Where><OrderBy><FieldRef Name='ID' Ascending='FALSE'/></OrderBy>",['ID']);
// Gets the ID of the item
var itemId = res.items[0]['ID']; // This is the newest item added by current user
// Clears the session variables to prevent redirecting multiple times
sessvars.$.clearMem();
// Redirects the user to the correct item and opens it in EditForm
window.location.href = targetUrl + "?ID=" + itemId;
}
</script>
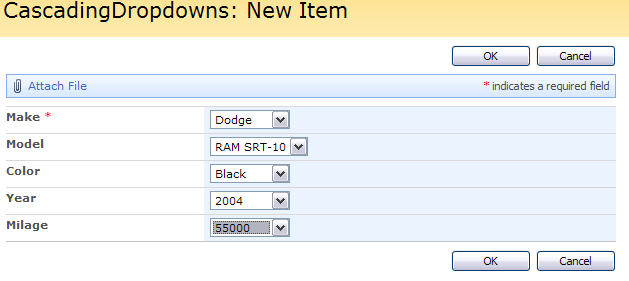
When a user saves the list item – he is redirected to the EditForm (or DispForm if you specify it in the URL) of the list item he just added.
Please ask if something is unclear.
Alexander