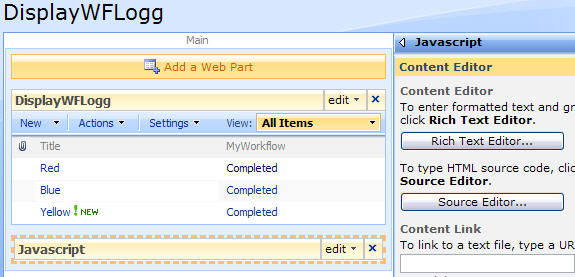
In this post i will show you how to display the workflow history log in the workflow status column instead of just “In Progress” or “Completed”.
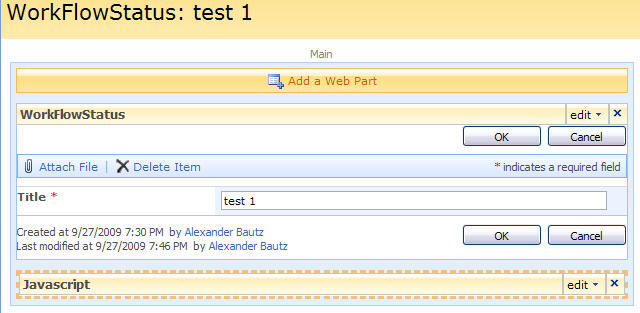
The default behavior is like this:
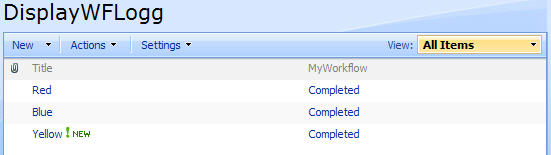
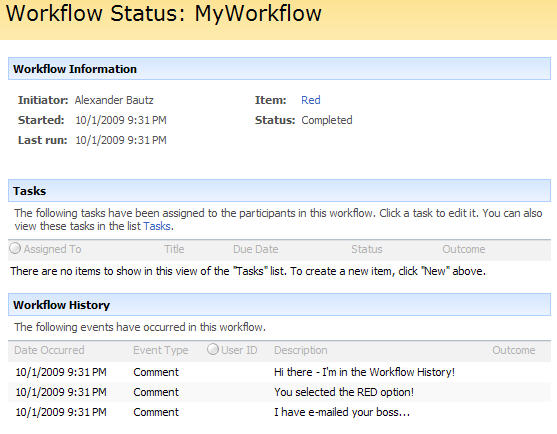
The status is “Completed”, but what did it do? A click on “Completed” brings up the workflow history log:
I think that is to complicated!
How about we display it like this:

Of course it is fully clickable, and takes you right to the good old workflow status page.
Here’s how it’s done
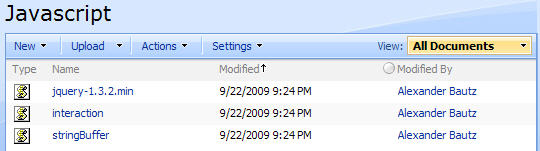
The list:
The workflow:
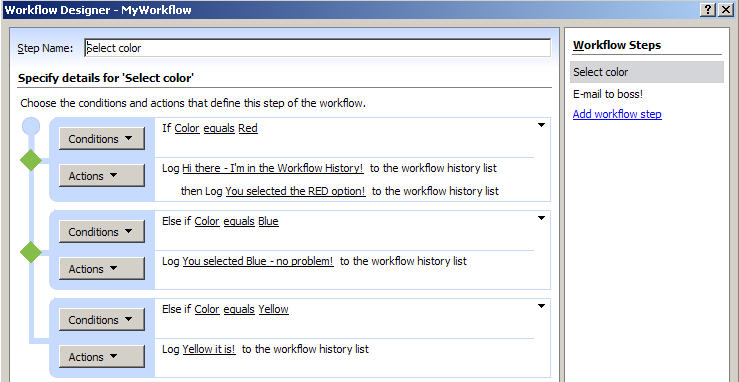
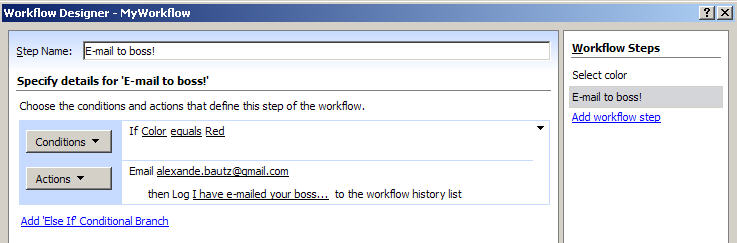
As always we start like this:
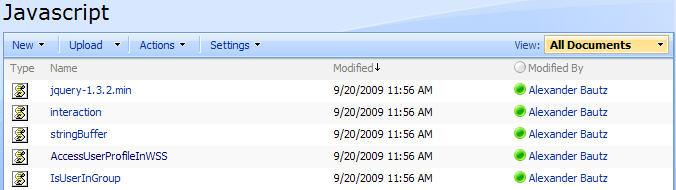
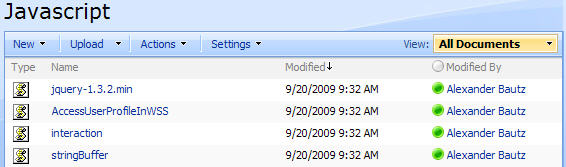
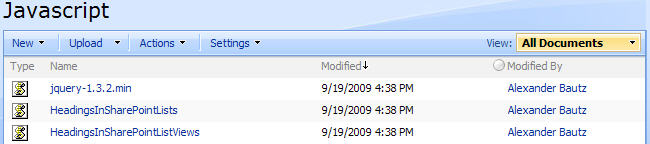
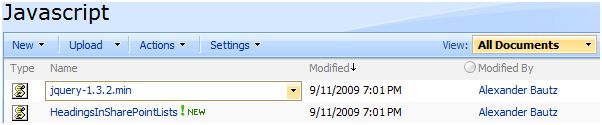
Create a document library to hold your scripts (or a folder on the root created in SharePoint Designer). In this example i have made a document library with a relative URL of “/test/English/Javascript” (a sub site named “test” with a sub site named “English” with a document library named “Javascript”):
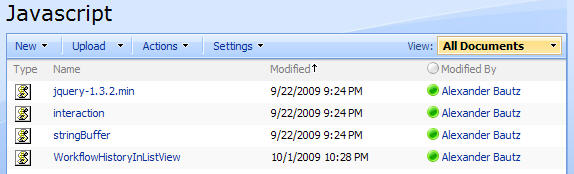
The code for the file “WorkflowHistoryInListView.js” is supplied below.
The jQuery-library is found here. The pictures and the sourcecode refers to jquery-1.3.2.min. If you download another version, be sure to update the script reference in the sourcecode.
The scripts “interaction.js” and stringBuffer.js” is created by Erucy and published on codeplex – you can find them here.
Add a CEWP below your ListView like this:
With this code:
<script type="text/javascript" src="/test/English/Javascript/jquery-1.3.2.min.js"></script>
<script type="text/javascript" src="/test/English/Javascript/interaction.js"></script>
<script type="text/javascript" src="/test/English/Javascript/stringBuffer.js"></script>
<script type="text/javascript">
   WfListGuid = "{49293528-0c47-4150-b70c-77e876548d12}";
</script>
<script type="text/javascript" src="/test/English/Javascript/WorkflowHistoryInListView.js"></script>
You could also use WfListGuid = “Workflow History”; for a english language site – but remember that the displayname of your workflow history list will change depending of your site’s language. I personally always use list GUID.
Note! The workflow history list is only present in a site if there is at least one workflow configured. If it’s not present in your site – it will be created with your first workflow. All subsites has it’s own workflow history list.
The list GUID for your Workflow history list is found like this:
Browse to your list by its “displayname” – Workflow History for a english site (it’s hidden from browser’s and do not display in “View all site content”). When in doubt – use SharePoint designer to get the name of your list among the other lists in the “Lists-folder”.
When you have browsed to the list – right click and view source. Search for “listName” and you will find it like this:
ctx.listName = “{49293528-0C47-4150-B70C-77E876548D12}”;
Here’s the sourcecode for the file “WorkflowHistoryInListView.js”:
/* Display the "Workflow History" instead of just "In Progress" or "Completed" in the Workflow-status column
 * ---------------------------------------------
 * Created by Alexander Bautz
 * alexander.bautz@gmail.com
 * https://spjsblog.com
 * Version: 1.0
 * LastMod: 01.10.2009
 * ---------------------------------------------
*/

listGuid = ctx.listName; // SharePoint provides this

WriteLogg();
function WriteLogg(){
if(typeof(wfListObj)=="undefined")wfListObj = getWfLogg(); // If not already createt - build an "object" containing all WF-history for the current list
$('a[href*="WrkStat.aspx"]').each(function(){ // Find all a-tags that have a href containing WfkStat.aspx
	if($(this).text()!=''){
		var wfGuidRaw = $(this).attr('href'); // Get the href
		var wfGuid = unescape(wfGuidRaw.substring(wfGuidRaw.lastIndexOf('WorkflowInstanceID=')+19)).toLowerCase(); // Get the GUID of the current WF from the href
		var wfLogg = wfListObj[wfGuid] // Get the actual history from the WF-object by "asking" for the log on this list items GUID
		if(wfLogg!=undefined){ // If the workflow history isn't empty
			wfLogg = wfLogg.split('|').join('<br>'); // Separate the lines
			$(this).html(wfLogg); // Set the clickable part of the a-tag to the actual history from the log
		}
	}
});
}

function getWfLogg(){
wsBaseUrl = L_Menu_BaseUrl + '/_vti_bin/'; // Set the path to the webservice "lists.asmx"
var query = "<Where><Eq><FieldRef Name='List' /><Value Type='Text'>" + listGuid + "</Value></Eq></Where>"; // Get all WF-history for the current list
	var res = queryItems(WfListGuid,query,['ID','WorkflowInstance','Description']);
	obj = {};
		if(res.count == -1){
			alert("An error occured in the query:n" + query); // On error
		}else{
			$.each(res.items,function(idx,item){
				if(item['Description']!=null){
					// Is there history already logged on this GUID?
					if(obj[item['WorkflowInstance']]==undefined){
						// No
						obj[item['WorkflowInstance']] = item['Description'];
					}else{
						// Yes - add to it so that all log on current WF-run is displayed together
						obj[item['WorkflowInstance']] = obj[item['WorkflowInstance']] + "|" + item['Description'];
					}
				}
			});
			return obj;	// Return object containing all WF-history on current list
		}
}

// Attaches a call to the function to the "expand grouped elements function" for it to function in grouped listview's
function ExpGroupRenderData(htmlToRender, groupName, isLoaded){
	var tbody=document.getElementById("tbod"+groupName+"_");
	var wrapDiv=document.createElement("DIV");
	wrapDiv.innerHTML="<TABLE><TBODY id="tbod"+groupName+"_" isLoaded=""+isLoaded+"">"+htmlToRender+"</TBODY></TABLE>";
	tbody.parentNode.replaceChild(wrapDiv.firstChild.firstChild,tbody);
WriteLogg(); // Call the script - the rest of the function "ExpGroupRenderData" is a unmodified SharePoint function from the file "BFORM.JS"
}
That’s it!
Feel free to ask if something is unclear.
Alexander