Change log
May 03. 2013
Changes in v1.3:
Changed how the dateformat is read from “settings.dateFormat” to handle formats with four digit yyyy.
10.11.2012 Updated to v1.2 to add mouseover displaying days, hours and minutes. This update also includes the time portion of the “DueDate” in the calculation. Please note that the calculated column code must be changed if you want the time taken into account.
The CEWP code has not changes since the last release, but if you want to override the English text used in the mouseover, include this in your CEWP code (or modify in the file “HighlightRowByDueDate.js”:
var prefix = ["Due in ", "Overdue by "];
var tDays = ['day','s'];
var tHours = ['hour','s'];
var tMinutes = ['minute','s'];
30.11.2011 I had a bug that made it work for grouped views only. This is fixed in v1.1.
Only the code for the file “HighlightRowByDueDate.js” needs updating. Sorry for the inconvenience.
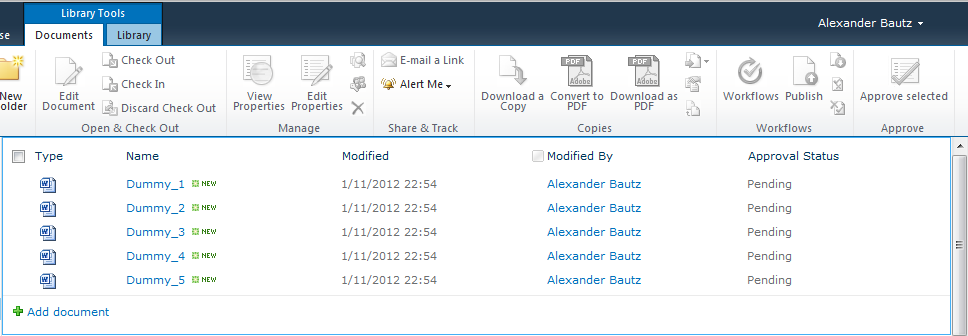
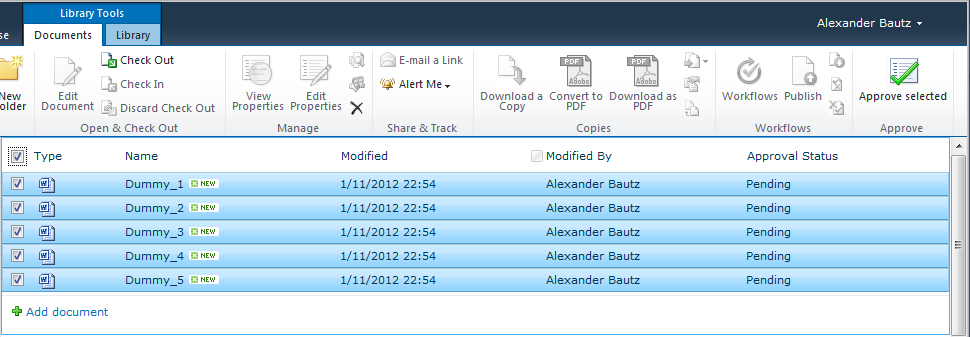
The first solution i posted in this blog was the Compare DueDate with Today in list view.
I have redone the solution and added support for SharePoint 2010 grouped views.
I have NOT included the mouseover “overdue by” text. If there is a demand for it, i could add it back in.
How to use
You put a CEWP below the list view web part. The actual code has been put in a separate file for use in multiple lists. The “function call” itself is placed in a CEWP below the list view web part.
The code for the file “HighlightRowByDueDate.js” is found here
Download the code and put in a text-file and place it in a shares document library (all users must have read access), or in a folder created in SharePoint Designer.
You should also put the CEWP-code in a text file in the same location and use the “Content Link” field in the “Edit web part” panel of the CEWP. This is most important in SharePoint 2010.
CEWP code
<script type="text/javascript" src="https://ajax.googleapis.com/ajax/libs/jquery/1.8.2/jquery.min.js"></script>
<script type="text/javascript" src="/test/English/Javascript/HighlightRowByDueDate.js"></script>
<script type="text/javascript">
/* Hightlight row by due date
 * ---------------------------------------------
 * Created by Alexander Bautz
 * alexander.bautz@gmail.com
 * https://spjsblog.com
 * ---------------------------------------------
 * This script depends upon functionality provided by jQuery - http://jquery.com
 * ---------------------------------------------
 * v1.2 - 10.11.2012
*/

function init_highlightOverdue(){
	var settings = {greenDays:'', // Green color for everything not yellow or red
					greenColor:"<img src='/_layouts/images/imnon.png' border='0'> ", // green image
					yellowDays:1, // Yellow color one day after due date has passed
					yellowColor:"<img src='/_layouts/images/imnaway.png' border='0'> ", // yellow inage
					redDays:2, // Red color two days after due date has passed
					redColor:"<img src='/_layouts/images/imnbusy.png' border='0'> ", // red image
					dateFormat:'mm/dd/yy',
					identifierText:'Due:',
					replace:true};
	highlightOverdue(settings);
}
</script>
NOTE
You must change the “src” in the script tag referring the script “HighlightRowByDueDate.js” to reflect your local copy.
Parameters explained
- greenDays: either an empty string ” to indicate “green for everything not yellow or red” or an integer (positive or negative) to indicate the “offset” to highlight green.
- greenColor: The image or text / HTML yo mark the items as “green”.
- yellowDays: The number of days (positive or negative) to offset the yellow marker.
- yellowColor: The image or text / HTML yo mark the items as “yellow”.
- redDays: The number of days (positive or negative) to offset the red marker.
- redColor: The image or text / HTML yo mark the items as “red”.
- dateFormat: The date format used in your calculated column (see details below).
- identifierText: The lead-in text in the calculated column. This value is used to identify the cells to “treat”.
- replace: true or false – should the “image” replace the text in the cell, or prepend to the value.
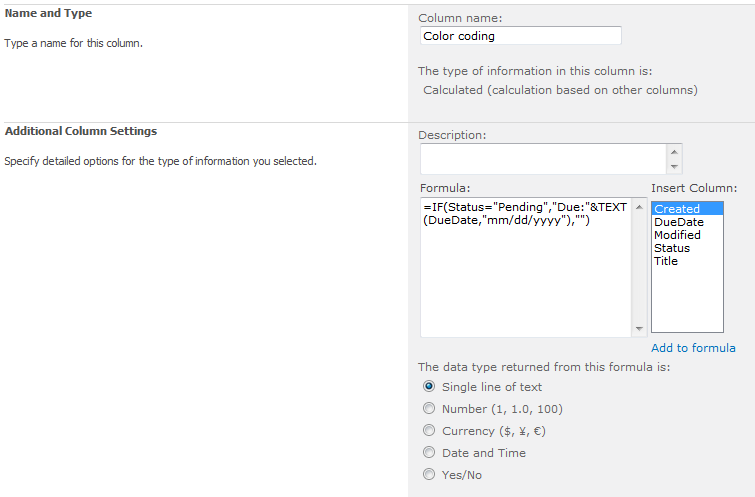
The calculated column
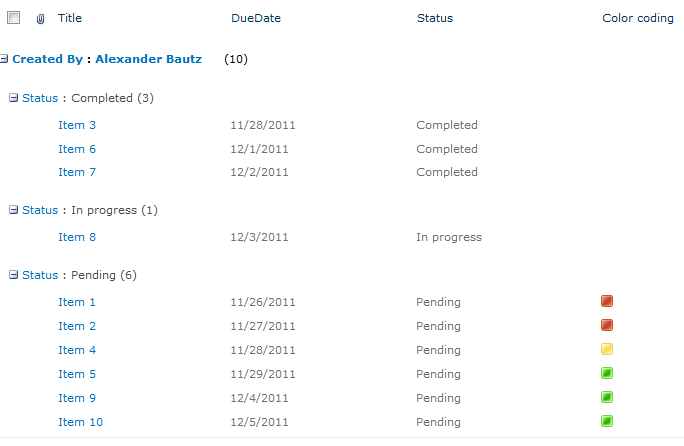
The “trigger” for the script is the lead in text in the calculated column – this text must match in the calculated column AND in the attribute “identifierText” in the settings object in the CEWP.
Note the text “Due:” in the calculated column in this example:
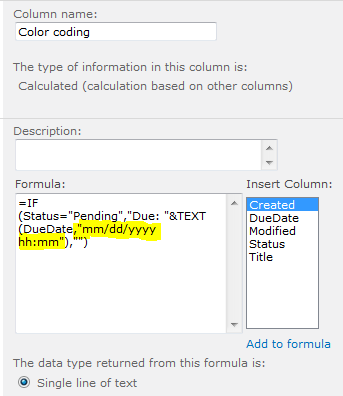
Note: The calculated column must be in the view to make the solution work.
Let me know if something is unclear
Alexander
Like this:
Like Loading...