Updated 10.10.2009: To use this script with the script Headings in SharePoint Forms – jQuery you must set the parameter “stretch” for the heading script to false. You must also call the heading script before the “Narrowing list form to one column-script”.
I have made a tiny update to the heading script to support setting the backgound color when using it with “Narrowing list form to one column-script”.
I got a request for a solution to narrow down the list form to one column with the “formlabel” above the “formbody”.
This is actually a very simple task.
As always we start like this:
Create a document library to hold your scripts (or a folder on the root created in SharePoint Designer). In this example i have made a document library with a relative URL of “/test/English/Javascript” (a sub site named “test” with a sub site named “English” with a document library named “Javascript”):
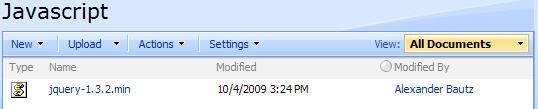
The jQuery-library is found here. The pictures and the sourcecode refers to jquery-1.3.2.min. If you download another version, be sure to update the script reference in the sourcecode.
Add a CEWP below your NewForm list-form (and EditForm if you like) like this:
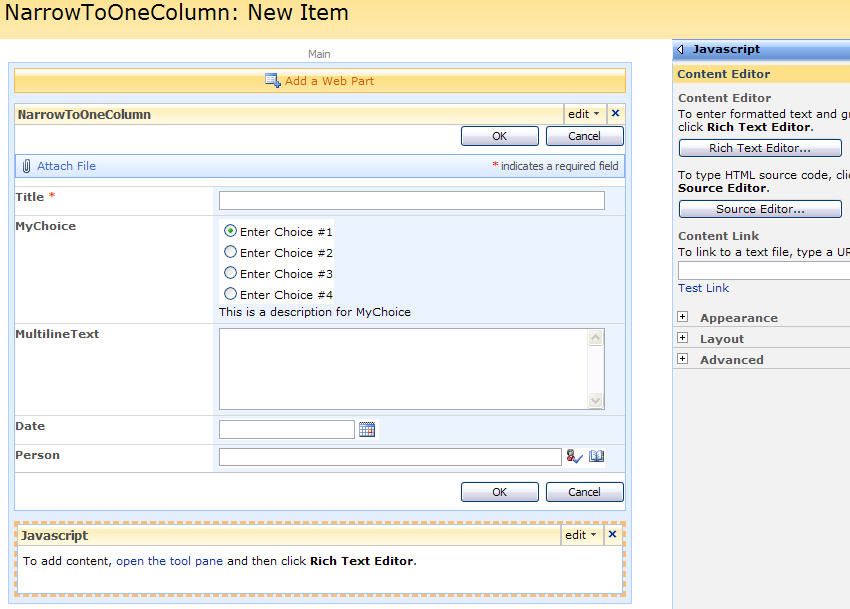
Add this code to the CEWP:
<script type="text/javascript" src="/test/English/Javascript/jquery-1.3.2.min.js"></script>
<script type="text/javascript">
$(document).ready (function() {
	// This image sets the width of the form to min 590px - it must be removed
	$('#onetIDListForm img[width=590]').remove();
});

$("td.ms-formlabel").each(function(){
	// Get the html of the formlabel
	var label = $(this).html();
	// Insert the label over the formbody
	$(this).parents('tr:first').find('.ms-formbody').prepend(label);
	// Remove the original label
	$(this).remove();

});
</script>
Note: If you use this solution with other solutions that modifies the formbody – like the Wrap choice-field in multiple columns, you have to call this script last to have the “formlabel” added in the right position.
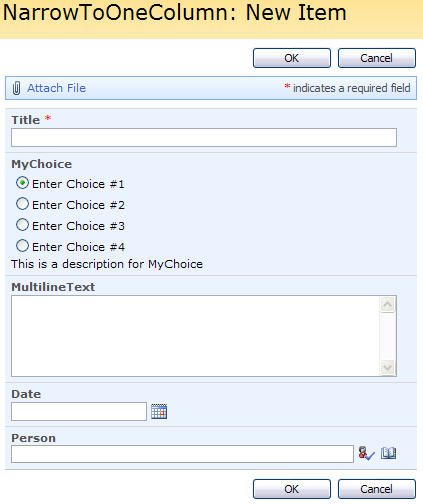
Your end result should look like this:
As always – ask if you do not understand how to use this script
Alexander
Fantastic!! Thank you –
Charlie Epes
Buffalo, NY
This is a nice one, thanx for sharing!
– http://www.sharepointdesigners.net –
Small update made to the Headings in SharePoint Forms – jQuery to make it fully compatible with this script.
Alexander
you continue to put out some great stuff. Here is a question. I want to add a tool tip for some or all field titles. I want something somewhat dynamic, different for each field title. I have found many tool tip scripts, but none I could apply to the field titles. If you can move or hide them there should be a way to apply the tip, correct?
Hi Larry,
I put together a short example here:
Edit the title property of a field to add custom tooltip
Alexander
I am using this script with the show header script you created. I realized after that you remove or hide the label column. IS there a way to use bother scripts, get the header text to display on the header fields and hide the others?
You must set the parameter “stretch” for the heading script to false to use it with this script. Read the comment in the top of this post about updating the heading script.
Alexander
hey again, there should be a way to set the width, correct?
There are – in the heading script, but when narrowing to one column the label column is removed. To set the width when narrowing to one column you can modify the width of the image which is removed to “slim down” the width. Do it like this (line 5 in the above codeblock):
$('#onetIDListForm img[width=590]').attr('width','500');That was much easier than adding options to the ms-standardheader class.
this was a great post. I have been trying to do this and you have answered my question. I have been reading through your blog and what you have done is absolutely outstanding.
Great Work!
Thank you!
Any ideas on how to get the radio buttons to show horizontally instead of vertical?
Have you read this?
Wrap choice-field in multiple columns
Alexander
this may be the place to post this question. I know we can edit the forms, which give us the abiltity to rearrange the placement of the form fields. This requires us to actually edit the page. also we lose the attach file function.
You have done some great work manipulating the page elements. What I am wondering is: is there a way to lay related fields to appear in a single row on the form? Say there is a name, program and a date field. currently they appear horizontally. can the layout be manipultate easily to lay them out vertically?
Hi Larry,
Sorry for the late reply, but I have been in bed for the last week with my new friend (H1N1 Influenza).
This can be done by inserting a table where you want the fields to appear and move the selected fields into a separate “td” in this table. It would widen the form quite a bit though.
I will make a note of your request and try to make time to write about it.
Alexander
sorry about the arrival of your new friend, but glad you are back in the saddle
sorry I apologize for wasting your time but I dropped the cewp on the form and all i get is to see script now……
Hi,
I’m not sure what you mean, but did you put the script in a CEWP below the form? You did not copy the code with the line numbers did you?
– you have to hover the mouse over the code and click in the top right corner to get the code in the right format.
Alexander
I got it SORRY 🙁
Another silly question for some reason my form does not expand?
Hi,
I do not understand what you mean by “not expand”. Please explain.
Alexander